Setting up with a CNAME Record
Setting up with your CNAME is one of two ways in which you can register your web domain for protection with Polaris' WAAP. This is the advanced method and most users will register via the Nameservers method.
Once registered for the WAAP, the setup wizard will automatically take you through the following steps.
Step 1: Verifying your domain:
This step would have to be accomplished in your DNS provider which is the company that maintains your web services. Please refer to your DNS provider's FAQs or knowledge base on how to add a TXT record.
![]()
The above image is from adding a TXT record on the Polaris webpage. It should look similar on your DNS provider's page as well. Create a record with the following settings:
- Choose
Record Typeto be TXT - Leave the
Namefield blank or with@ - For the
Textfield, please copy and paste the value shown on the Setup Wizard - Set the TTL as automatic
These settings may not appear in the specified order, so please enter the respective values into the correct fields.
This verification process may take up to a day to complete. Once verification is done, you should receive an email and you would be able to continue with the Setup Wizard.
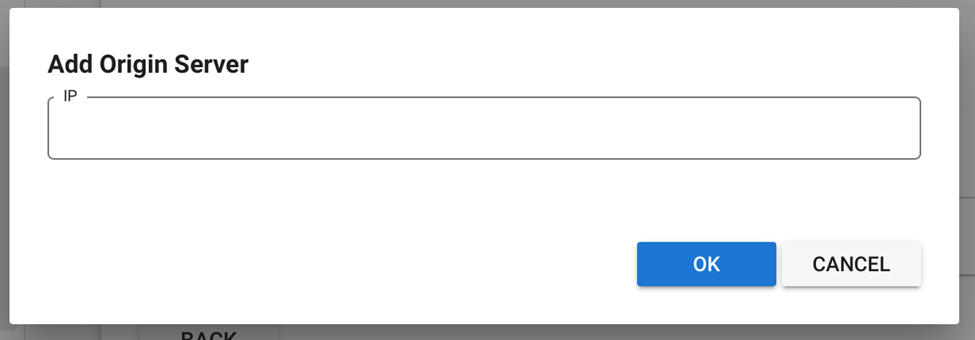
Step 2: Origin Server
In this step you will be adding the IP addresses of your website servers (also known as the Origin Servers).
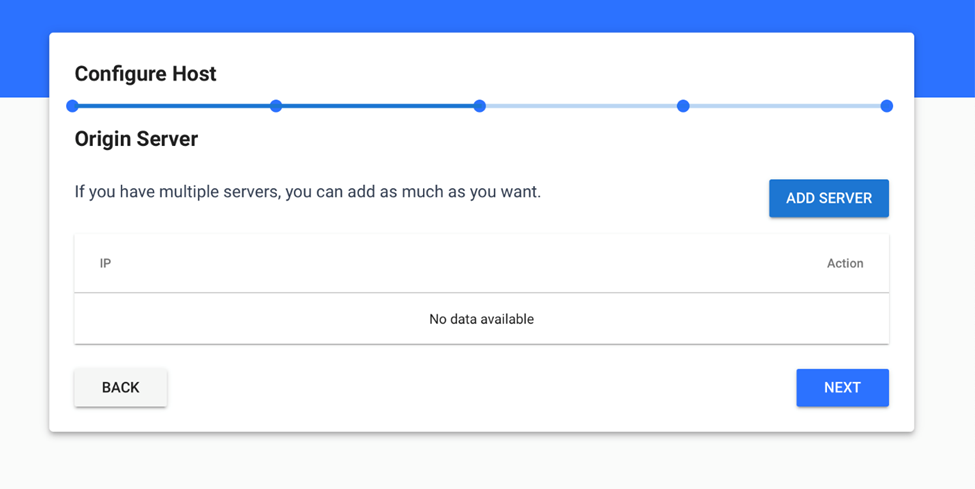
Click the blue Add Server button, this will popup another window where you can enter your IP
address. If you have multiple origin servers, please repeat this server several times.
If you made any errors while adding the origin server, remove the server with the remove option
and add it again. When you have added all your origin servers, click the blue Next button at
the bottom of the screen.
Step 3: Domain Configuration
In this step you will be configuring your domains to connect to Polaris. To do this you can add either A or CName records.
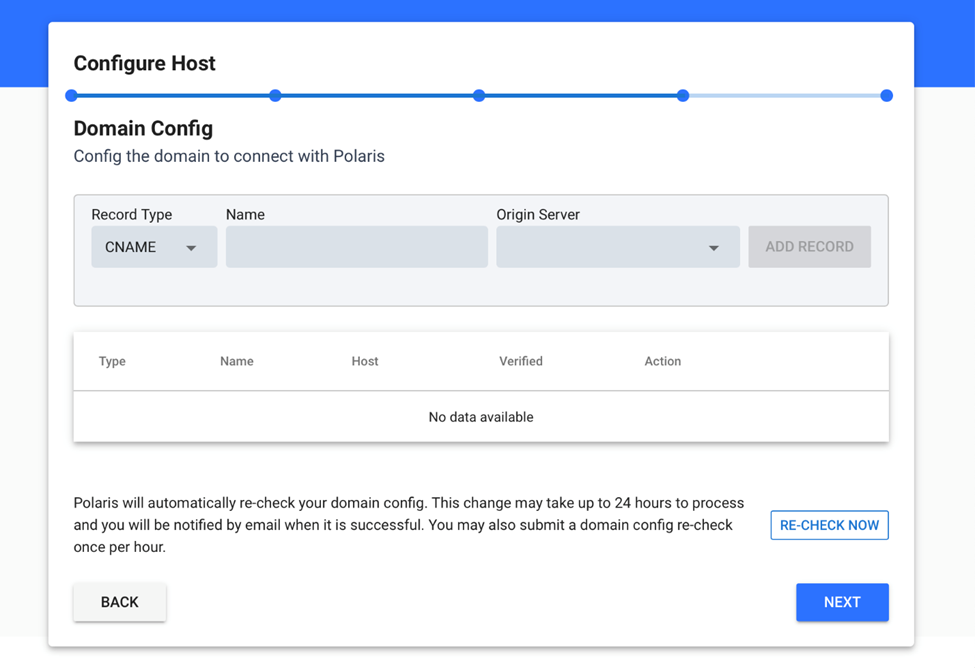
Choose the respective record type, enter its name into the Name field and select which origin
server the record belongs to from the dropdown list. The dropdown list will contain origin servers
added in step 2. You can also remove any records added wrongly with the Remove button in
the action column of the table.
Once the record has been added Polaris will check and verify your domain config, this will take a
while. You can check by logging in later, or with the Re-Check Now button. You can still
proceed to the next step even if it has not been verified.
Step 4: Additional Steps
You are done with the initial setup for your website. There are now several other settings you can now configure